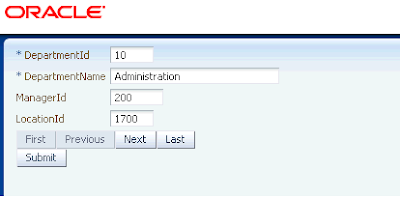
I noticed that most of the sample form applications have their field labels aligned right, as you can see in the example from my last post
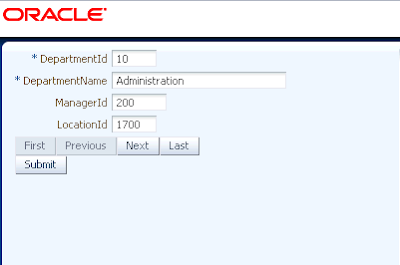
while I know from experience that most users prefer the labels to be aligned left.
Is it possible? Yes, it is, and here is how.
First of all, let me tell you that I was disappointed to find out that there is no property at the form layout that can be changed to do the trick. The property 'LabelAlignment' does not do it.
The solution seems to be: create a custom skin!
This is not easy at all. There are several instructions available that don't tell the whole truth, because they lack some crucial information.
In this post I will try to give an example which will be useful, but I realize that in the next version of JDeveloper things may be different. Here I use 11.1.1.5.0.
Creating a custom skin means that we will make a new CSS file and so it will be useful to use the ADF extensions to the CSS editor, which are not enabled by default, so in Tools -> Preferences -> CSS Editor check the option 'ADF Faces Extension'.
Next thing we'll do is register the schema definition trinidad-skins.xsd for our file trinidad-skins.xml. In Tools -> Preferences -> XML schemas and click the button 'Add' and browse to '<JDeveloper_Home>/Oracle/Middleware/oracle_common/modules/oracle.adf.view_11.1.1/trinidad-impl.jar!/org/apache/myfaces/trinidadinternal/ui/laf/xml/schemas/skin/trinidad-skins.xsd'. Fill in extension '.xml'. This seems to be an essential step.
These actions are explained well in Oracle's Documentation, if it's still there.
Next thing we'll need to do is to create a file named 'trinidad-skins.xml' and the point is that it needs to be created in the right location, so right click on ViewController in your project (I use the project made in my last post), and choose "New..."

then choose General -> XML -> "XML Document from Schema", which will popup up a dialog. In this dialog we type in the name of the file "trinidad-skins.xml", we add "\src\META-INF" to the directory and we check the "Use Registered schemas" option:
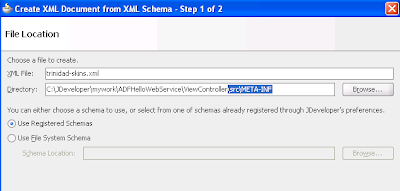
and then click "next". On the next screen accept the default namespace "http://myfaces.apache.org/trinidad/skin", but change the root element to "skins" and click "finish". This will create a XML file based on the chosen schema definition.
Note that the file has been added to our 'ViewController' -> 'Application Sources' -> META-INF 'folder'.
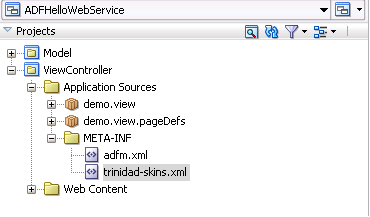
Now we will enter some essential data (click on the image to enlarge):
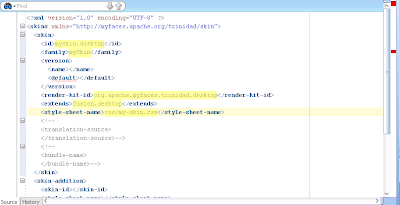
first of all, the id of our skin:
<id>myskin.desktop</id>, then the skin family, that will be the identifier to be used by our application (file trinidad-config.xml): <family>mySkin</family>, then <render-kit-id>org.apache.myfaces.trinidad.desktop</render-kit-id>, which is default, the extend-tag indicates that we will extend the fusion skin <extends>fusion.desktop</extends>, and very important the location of our skin: <style-sheet-name>css/my-skin.css</style-sheet-name>. We will have to create that one now. Note the location "css/...". It is very important to get this location right, since otherwise the application won't find it.
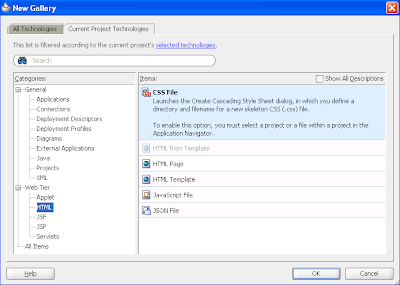
So we will create our css-file now. Right click "ViewController", choose "New..." and choose 'CSS file' from the 'Web Tier' -> 'HTML' section.
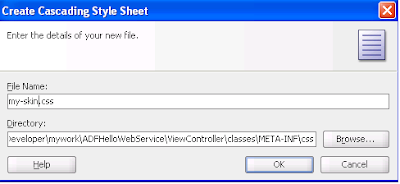
Change the file name to "my-skin.css" and change the default location to "...\ViewController\classes\META-INF\css". (Note that the default location is ..."ViewController\public_html\css", which will not work).
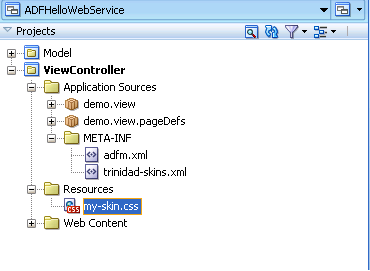
After clicking OK, we will see the file appear in our project under "Resources" , which should be fine.
and we add at the end of this file the magic words:
af|panelFormLayout::label-cell{text-align: left;}
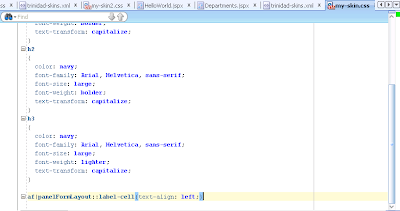
Save the file.
Now we have to tell our application to use this new skin, so we have to find the file 'trinidad-config.xml'. It is in the folder 'Web Content\WEB-INF', as shown here:
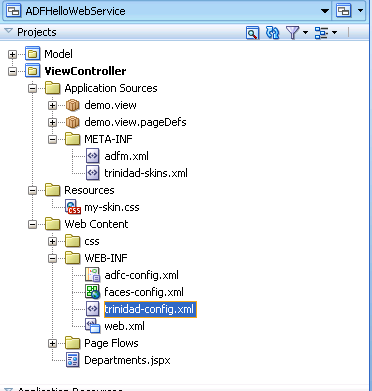
In this file we change the skin-family to 'mySkin' and we empty the skin-version.

And, after saving the file, we right-click 'Departments.jspx' and choose 'Run'.
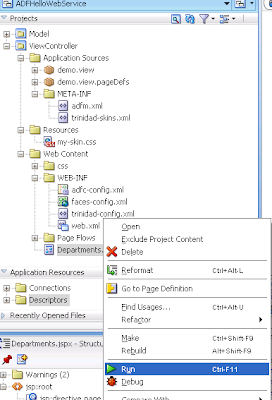
and we see our screen with labels aligned left:
